Posts

Character.

Image
As a portrait artist, faces are my 'thing', I enjoy creating them more then any other part of the horse, and have usually finished the face in the very early stages. On this guy I am only re-sculpting the bottom half of his face, as the eyes he already has are fine, they will get eyelashes, but that is it. So let's begin :) First assemble all the players. Pony, Apoxie Sculpt, for face work like this I use the Aves safety solvent for smoothing (it stays wetter for longer then the metho, and does not make the clay sticky like water) a soft cheapo brush. My sculpting tools are an orange (cuticle) stick, a sanded and shaped wooden skewer and a toothpick. Pony is ready, his face is already roughed up from where I dremeled his features off. Following my reference photos, I add to his profile, giving him more forehead, continuing right down and including the squishy bit between his nostrils. Once I think I have it 'about' right, I use my finger in the solven...

All finished.

Image
The big fulla is done, and up for sale! http://www.ebay.com.au/itm/250908569916?ssPageName=STRK:MESELX:IT&_trksid=p3984.m1555.l2649 I have chosen to list him on eBay, something different, and not sure if I am terribly comfortable with it just yet. Not that I have anything against eBay, I don't, I think it is a safe way to sell and buy, but the anticipation literally kills me, I am a nervous wreck till the last minute. Lots more photos on his Auction site. Painting finished ...back to sculpting, YAY!

Painting ...

Image
... is not my favourite part of customising unfortunately. I love watching the horse come to life, I love the end result, I love scouring the Internet looking for the perfect colour, but when it actually comes to applying the pastels, procrastination becomes my greatest talent. This time however I am using Jaime Baker's DVD's to paint. I have learnt that in most ways, I was doing it sorta right, but those few extra tips and tricks from an experienced artist have really made a huge difference to my style and technique. I feel that I am in control of my pastels, but not micro managing them as I used to. I have been able to loosen up and look at the horse as a whole, not just a little section at a time. I am also looking at my reference photos with new eyes, they have made me think about what technique I can use to get a certain effect. But best of all, my motivation and confidence to paint and create a realistic end result has increased 100%. Bloody...

The big Fulla ...

Image
And I am in no way kidding, there is so much work on this fellow that he weighs in at 720gms. So very close to being finished, in these pics all he is lacking are his eyelashes and veins. When he is done, he will be painted a warm soft dapple grey suitable to his age. With his stallion bulk and the movement of dressage he is performing, I am thinking he is about 10 to 12 years old. Silly begger got sick of waiting for me to edit his photos, so laid down and had a roll, lol. he really does have a face only a mother could love. And a reminder of where he began .... Photo credit to Melissa Williams, Identify my Breyer

Reference photos

Image
Remember I mentioned the importance of good reference photos? Well there is no point having them if you don't use them :) I have taken a photo of the foal into Paint.NET and made it black and white, then used pencil sketch to make it more contrasty (I am sure that is a word :) if not it should be). Then, with this altered photo in front of me, and a Sharpie in my hand, I mark the areas I want to change. The areas I want to carve out are shaded, the areas that need a gentler hand are lined. I then end up with a graffiti pony like this; The area at the base of his neck, and at his elbow are bits I will be adding to, the rest will all be substantially carved out. Mmm, spaghetti leg! Next is more Dremel work ...*happy sigh* I love my Dremel.

Blobbing clay on.

Image
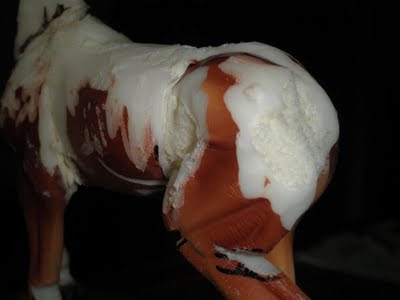
Both satisfying and fun! I love this part of the customising, were I can throw Apoxie in the general direction of the horse, in general muscle shapes. This is the point where I want to find the shape and feel of the sculpt, where what I pictured in my head begins to come to life. Lots of mistakes are made, nothing that cannot be fixed  :) ...and before the ridiculous amounts of sanding. There still has to be a lot of playing with proportions, such as the near side stifle, really not happy with how it is translating. So I will e doing a lot of staring at it and some measuring as well. Right now I think it is too low and without tension. Neck muscles will have to be sanded right down, way too much bulk there! Shoulder points are very uneven, even allowing for leg lift, so they will be evened up as well. I will make these alterations before I add anymore Apoxie, as there is no point putting good over bad :) An important thing to remember when you start...

Bendy bits done :)

Image
I have now altered all the bits I highlighted as needing changes in Photoshop. The hooves and psterns are still a wreck, but I am going to leave them alone for now.  Here you can see just how much original plastic I have removed, and how the Space Invader is holding him steady.  He looks very up hill now because I have completely removed his hips and rump, that will change when I start adding Apoxie. Little young to be doing a piaffe! :D     I need to do some more playing around with his head placement, as right now he looks like he is shying away, when I want naughty-snorty. Should just be a matter of dropping his nose a touch.   Next comes the fun stuff, Apoxie Sculpt!