Posts

Showing posts from September, 2011

The big Fulla ...

Image
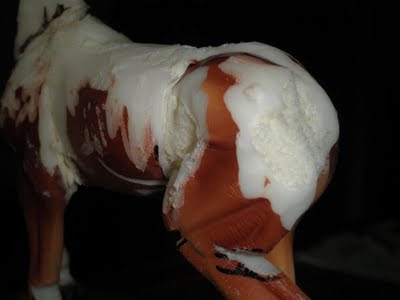
And I am in no way kidding, there is so much work on this fellow that he weighs in at 720gms. So very close to being finished, in these pics all he is lacking are his eyelashes and veins. When he is done, he will be painted a warm soft dapple grey suitable to his age. With his stallion bulk and the movement of dressage he is performing, I am thinking he is about 10 to 12 years old. Silly begger got sick of waiting for me to edit his photos, so laid down and had a roll, lol. he really does have a face only a mother could love. And a reminder of where he began .... Photo credit to Melissa Williams, Identify my Breyer

Reference photos

Image
Remember I mentioned the importance of good reference photos? Well there is no point having them if you don't use them :) I have taken a photo of the foal into Paint.NET and made it black and white, then used pencil sketch to make it more contrasty (I am sure that is a word :) if not it should be). Then, with this altered photo in front of me, and a Sharpie in my hand, I mark the areas I want to change. The areas I want to carve out are shaded, the areas that need a gentler hand are lined. I then end up with a graffiti pony like this; The area at the base of his neck, and at his elbow are bits I will be adding to, the rest will all be substantially carved out. Mmm, spaghetti leg! Next is more Dremel work ...*happy sigh* I love my Dremel.

Blobbing clay on.

Image
Both satisfying and fun! I love this part of the customising, were I can throw Apoxie in the general direction of the horse, in general muscle shapes. This is the point where I want to find the shape and feel of the sculpt, where what I pictured in my head begins to come to life. Lots of mistakes are made, nothing that cannot be fixed  :) ...and before the ridiculous amounts of sanding. There still has to be a lot of playing with proportions, such as the near side stifle, really not happy with how it is translating. So I will e doing a lot of staring at it and some measuring as well. Right now I think it is too low and without tension. Neck muscles will have to be sanded right down, way too much bulk there! Shoulder points are very uneven, even allowing for leg lift, so they will be evened up as well. I will make these alterations before I add anymore Apoxie, as there is no point putting good over bad :) An important thing to remember when you start...

Bendy bits done :)

Image
I have now altered all the bits I highlighted as needing changes in Photoshop. The hooves and psterns are still a wreck, but I am going to leave them alone for now.  Here you can see just how much original plastic I have removed, and how the Space Invader is holding him steady.  He looks very up hill now because I have completely removed his hips and rump, that will change when I start adding Apoxie. Little young to be doing a piaffe! :D     I need to do some more playing around with his head placement, as right now he looks like he is shying away, when I want naughty-snorty. Should just be a matter of dropping his nose a touch.   Next comes the fun stuff, Apoxie Sculpt!

Heartbreaker Photoshop.

Image
Yay it is the weekend!   well almost  Therefore it is Heartbreaker time :) After the heating and the squishing I fill the cavity of the body with either foil, or space invader (do not use space invader if you intend heating the model again! Space invader is  VERY flammable). With Heartbreaker I have used the Space Invader. So no more heat gun. Now Heartbreaker is a Frankenstein mess right now, and I am itching to jump in and start Apoxie work. But it is so much cheaper and easier to go into a program like Paint.NET  and have a play with your sculpt digitally. By placing the sculpt onto a page of white paper, it brings the horse forward without a noisy background, making it much easier to photoshop.   Before After.  Before  After I am not a whiz with a computer, and what I have done is very simple, but these simple little changes on Paint.NET  help me see the changes that need to be made in plastic. Tomo...

Diary of a CM.

Image
More then anything, I love a good tutorial. More then any other question, I am asked is "How do I do it?" So I thought, why not put the two together and Blog on :) First a disclaimer. I have only finished 6 CMs before this one, I do not profess to be an expert by any stretch of the imagination. I will be guessing, making things up as I go along, and no doubt making lots of mistakes. So this is not really a tutorial, more of a diary of a CM. I will be starting a thread on Model Horse Blab with this guys progress, because I respect any artist that puts their work out there for critique, and although it is really, really  tough thing to do, it is a very important part of the learning process, and I am a firm believer in putting my money where my mouth is :) and I aim to get this pony to Breyerfest, so I really want it to be the best it can be. I will post a link to the thread once it is up :) So let's begin! First a photo for reference. I actually...

Stablemates, my new favourites!

Image
Since Cm'ing the Welsh D, I am addicted to these little guys! Compared to their larger cousins, they are so much easier. A little bit of Apoxie sculpt also goes a really really long way! I am still in the habit of mixing much more then I need, so the perfect answer to that problem is of course to CM more then one at a time, lol. So right now I have three on the go. This one is nearly finished. Just a few more tweaks and a lot more sanding. He began as a G3 walking Arab, you can see his original form here  He is a more drastic CM with pretty much new everything, though in the beginning he was to only have a new head set, mane and tail, but after removing his head, I lost it (typical!) so he had to have a new face. The old body no longer went with the new head, so it was altered as well. Then there are these two, the one on the left is a G3 Belgian, being CM'ed to a Welsh D cob, and on the right is a G1 Silky Sullivan. I have twelve Si...